
Create behavior-based email automation with Segment and Encharge.io
This article demonstrates how Segment and Encharge open endless possibilities for advanced behavior-based email marketing automation that converts, guides, and delights customers.
In this article
- Overview
- Add Encharge as Segment destination
- Available default event presets in Segment
- Build and activate your campaigns in Encharge
- Wrap up
1. Overview
In the world of B2B marketing, email campaigns remain a powerful tool for engaging with potential customers. However, the days of sending generic, one-size-fits-all emails are long gone. Today, success lies in crafting personalized and targeted email campaigns that resonate with your prospects. One key strategy that's driving results is the use of behavioral triggers.
Behavioral triggers are actions or events that prompt automated responses in your email marketing campaigns. These triggers are based on how recipients interact with your product. By capturing and analyzing these behaviors, you can deliver timely and relevant content that guides prospects through your application.
Note: This recipe assumes that you’ve already integrated Segment.com with your application. If you haven’t yet done that, feel free to check Segment documentation for guidance.
2. Add Encharge as Segment.com Destination
In order to send any behavior-based emails, you'll need data. Without data, action-based emails are impossible to accomplish. At the same time, it's not just about data, it also timing as well. If you want to capture the full value of behavior-based emails, you must ensure actions are captured and sent to Encharge instantly - that's where Segment does an exceptional job.
Follow the steps below to send data from Segment to Encharge:
- From your Segment account's Destinations page, click on “Add Destination”:

- Search for the "Encharge" destination within the Destinations Catalog and confirm the Source you’d like to connect to:

- Open the Encharge app and navigate to Configure Encharge (Actions):

- Select Configure Encharge (Actions) and choose the source you'd like to connect:

- Click Next and give your Destination a name, then select Create Destination:

- Configure the API and enable your destination on the destination settings page. The Encharge API key can be found on your Encharge Account page.

3. Available default event presets
Encharge Destination has the following event presets:
PRESET NAME | TRIGGER | DEFAULT ACTION |
|---|---|---|
Event type = "alias" | Alias User | |
Event type = "identify" | Identify User | |
Event type = "page" | Track Page View | |
Event type = "group" | Create or Update Object | |
Event type = "track" | Track Event |
To start with default events, enable the destination and click Save Changes. Otherwise, if you're looking to map custom actions, click on the Mappings tab and configure each action, and then enable the destination.
4. Build and activate your campaigns in Encharge
Once you've connected your destination, you can head over to Encharge.io and begin your setup. However, it's important to confirm that data is flowing in to your Encharge account.
Check if Encharge receives your data
Log in to your Encharge account or start a free trial. Head over to the events page and check if events are being automatically created as your users interact with your product. You should see something similar to the screenshot below:

Create a segment for each behavior
Once you’ve ensured the right data is coming in, you need to create a segment (list of people) in Encharge for each action to select later when you're building your behavior-based automation flows.
In this recipe, we'll use one of the major actions Encharge is tracking as an example - "Activated a flow". However, every application has its unique features, so it's important to use actions that are critical to the customer journey of your app users.
- Go to the "People" section in the main menu at the top, then click the "+" button toward the bottom left of the screen.
- From the pop-up menu, select "Add Segment" and add a name.
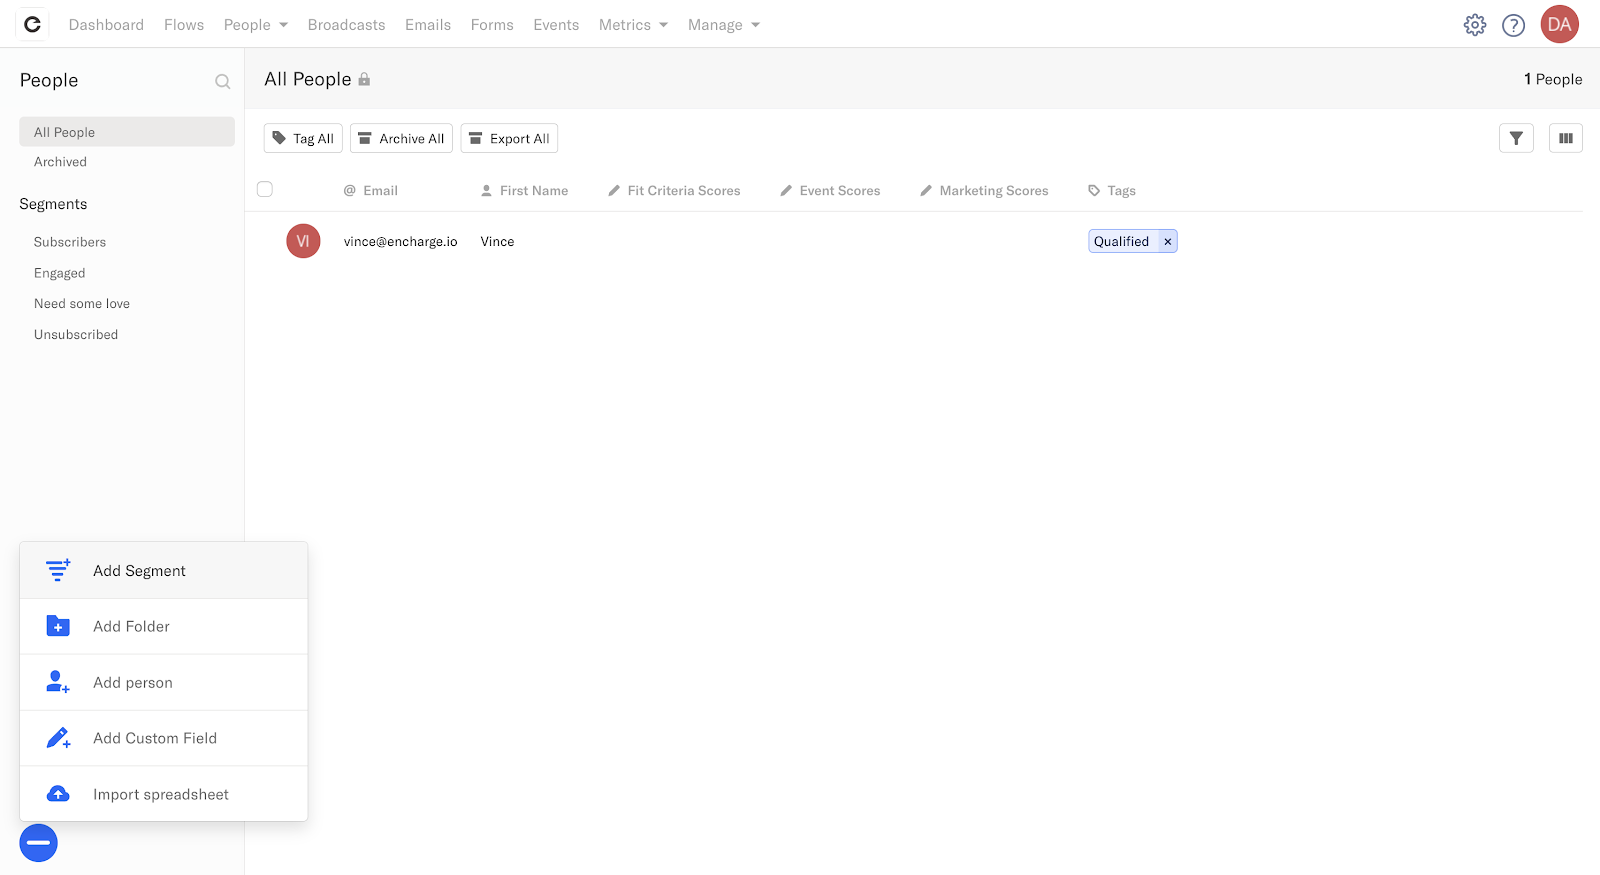
- Click on the "+ Condition" button and select "Event". This will allow you to select events coming from Segment.com
- Select the first action you will use for your behavior-based campaign. In this case, we'll select "Flow Activated" as an example.
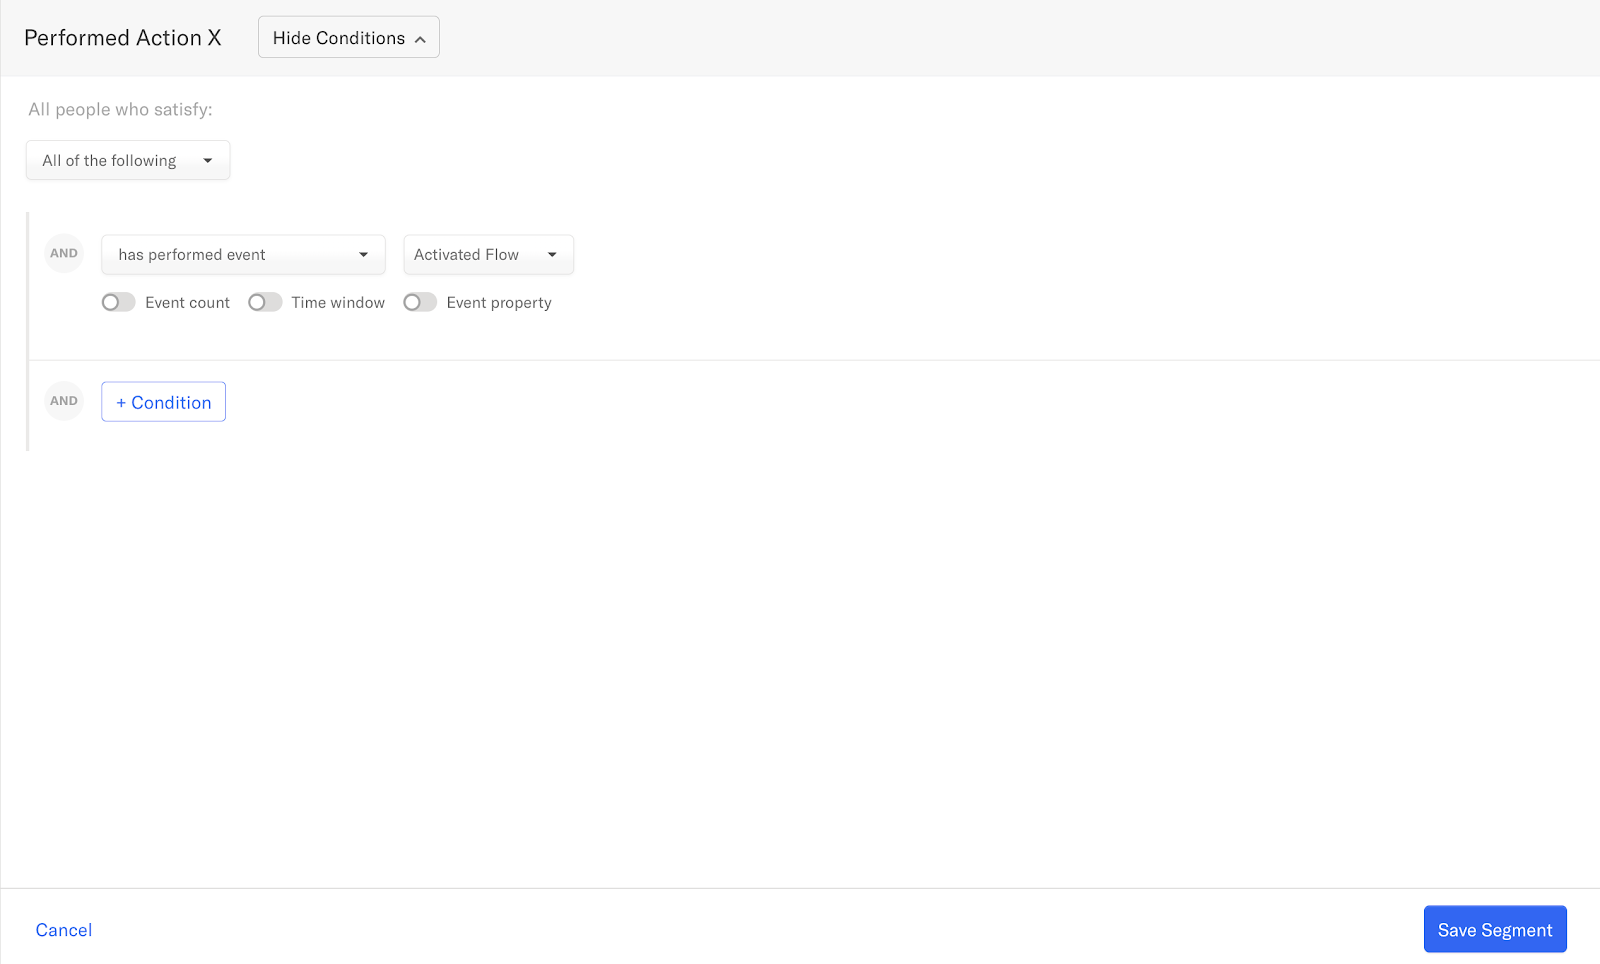
- When ready, click the "Save Segment" button toward the bottom right of the screen. You're good to go.
Repeat the same steps for each actions you're using in your behavior-based campaigns.
Create your emails in Encharge’s email builder
The next step would be to design your emails. Without them, you can't really send a campaign, so here's how to do that:
- Go to the "Emails" Section in the main menu at the top, then click the "+" button toward the bottom left of the screen.
- From the pop-up menu, select "Add Email (Drag & Drop)".
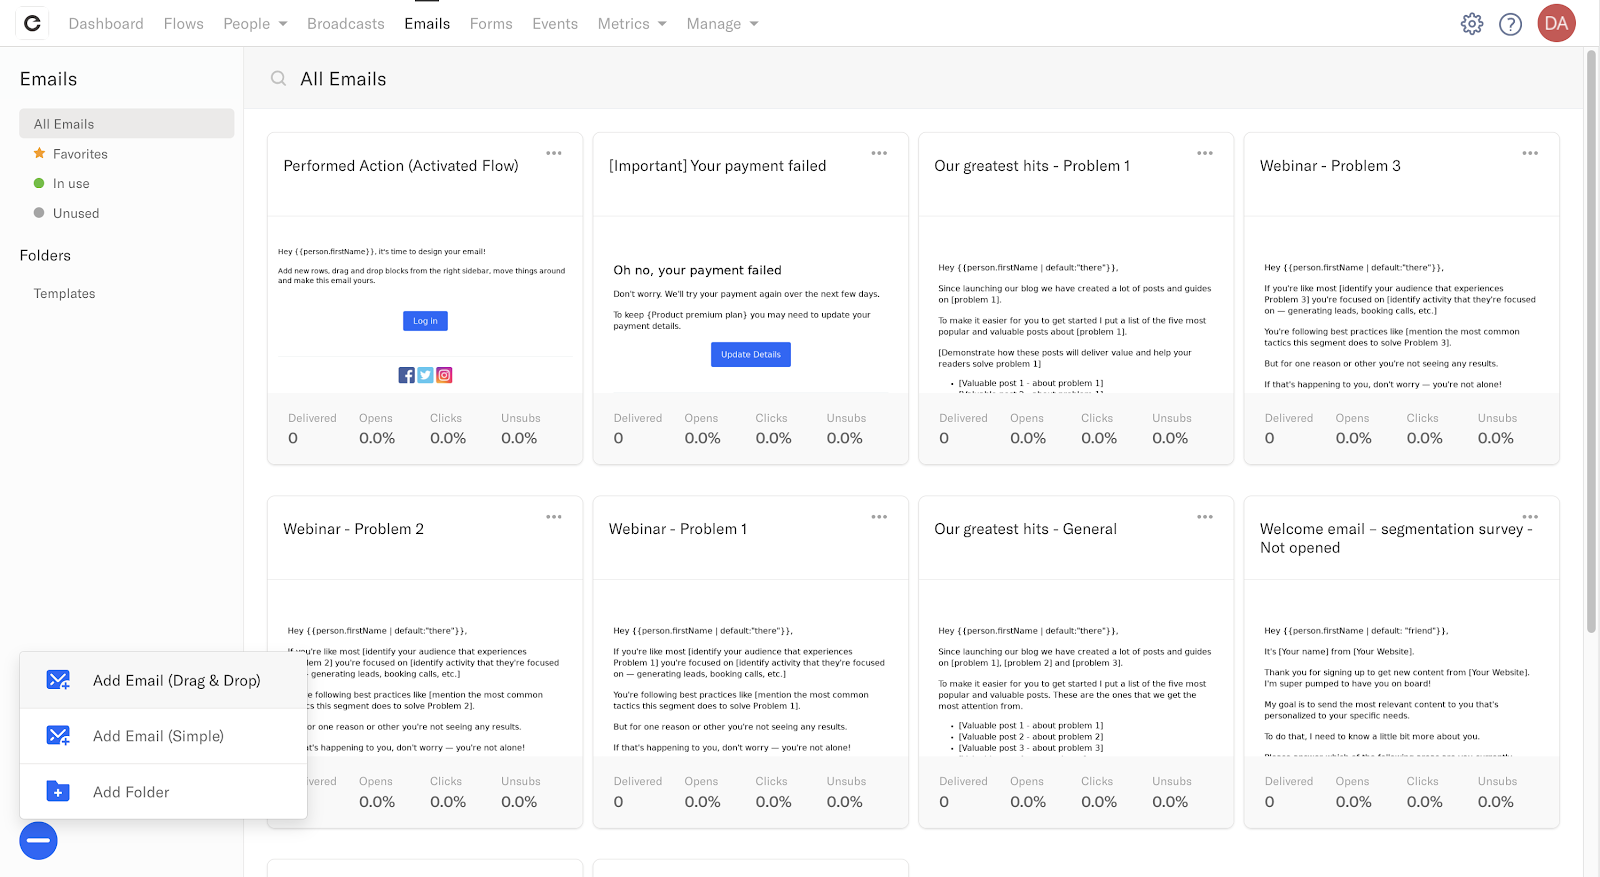
- Design your email based on your branding specifications and action we're targeting.
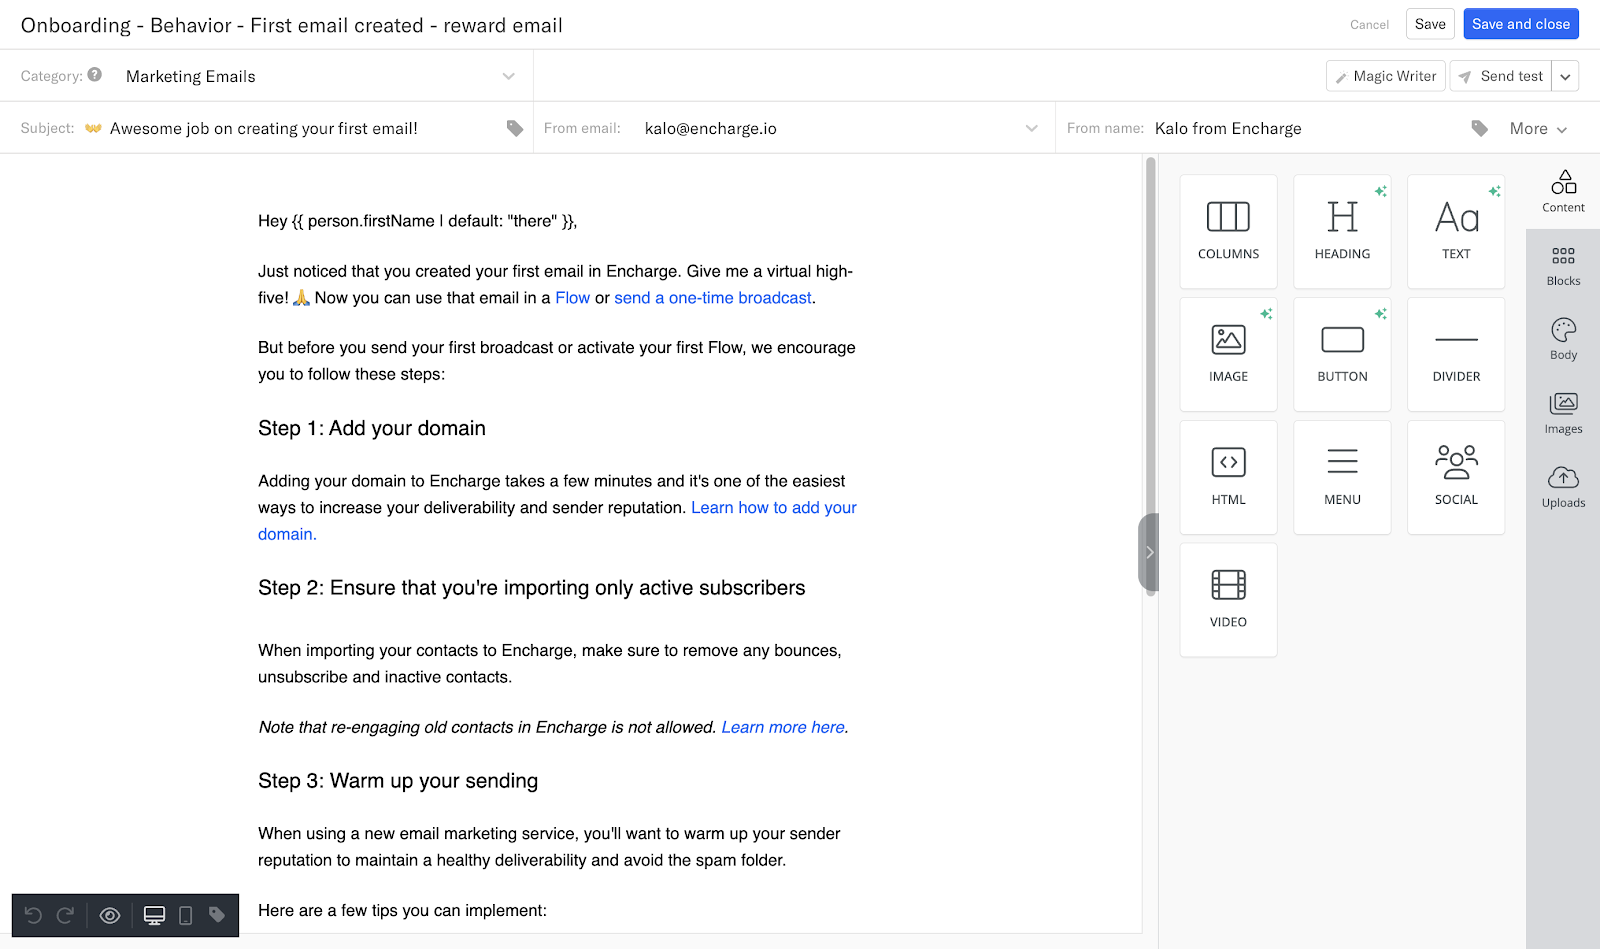
- Click "Save and close" once you're ready with your email. Don't forget to design an email for each behavior action you're using in your campaigns.Let's move on to the final stage of the setup. Creating the automation.
Create your automation in Encharge’s flow builder
With data flowing and our segments set up, we’re ready to create our campaign. Here’s how to do it:
- Go to the "Flows" Section in the main menu at the top, then click the "+" button toward the bottom left of the screen.
- From the pop-up menu, select "Add Flow" and choose the template option "Start blank"
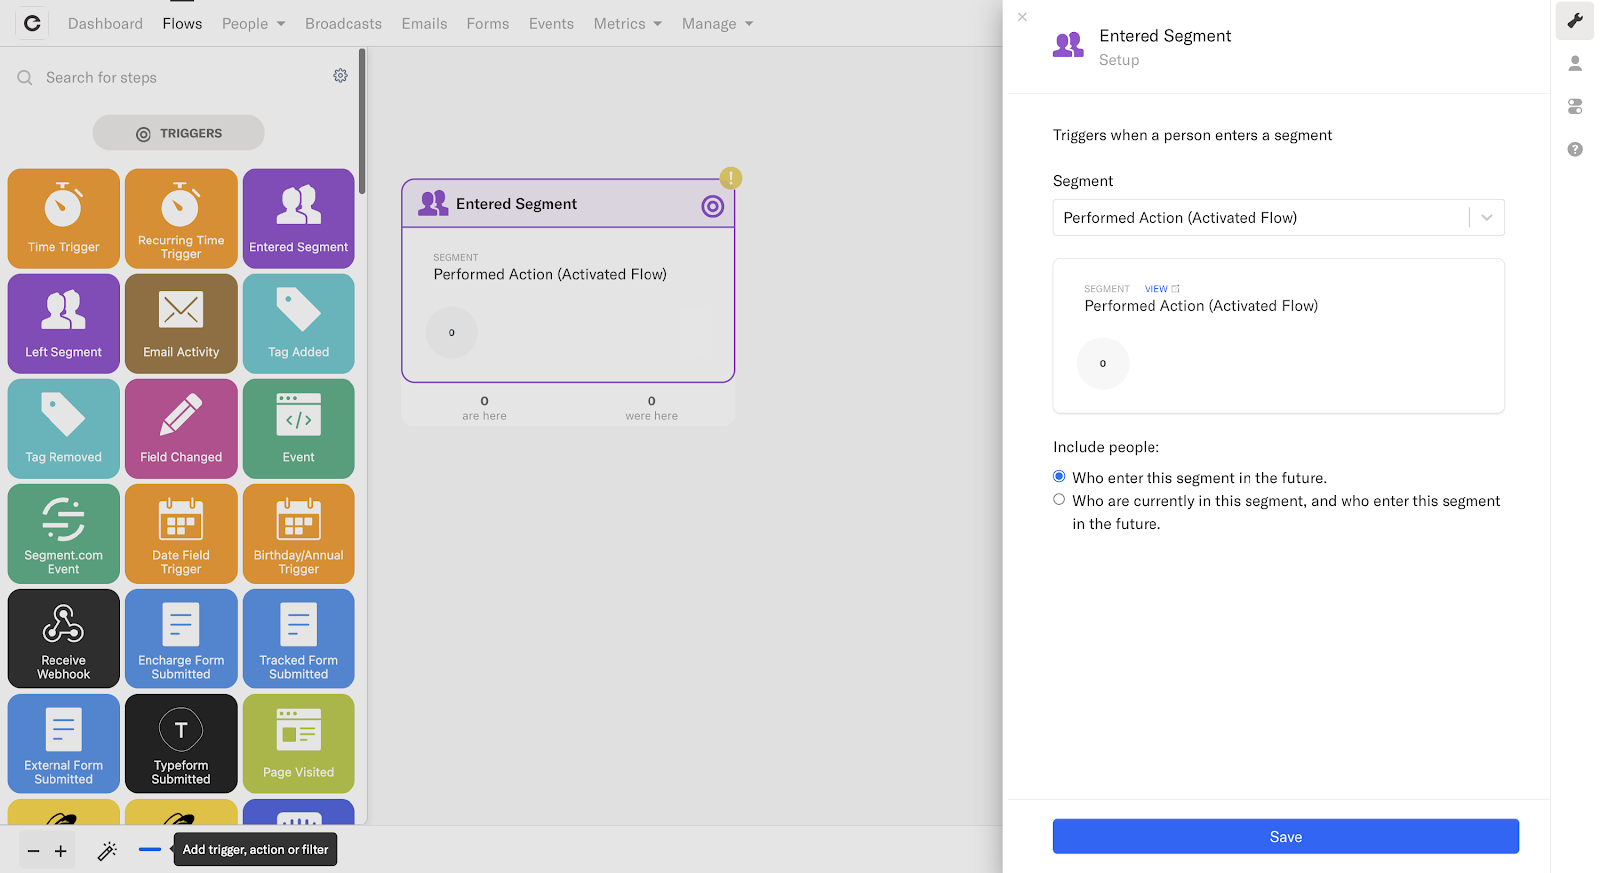
- On the left of the screen, you'll see all available triggers and actions that will help you construct your flow. Click the trigger "Entered Segment" and drag it onto the blank canvas.
- Click on the newly added "Entered Segment" trigger and select your segment from the dropdown. When ready, click "Save"
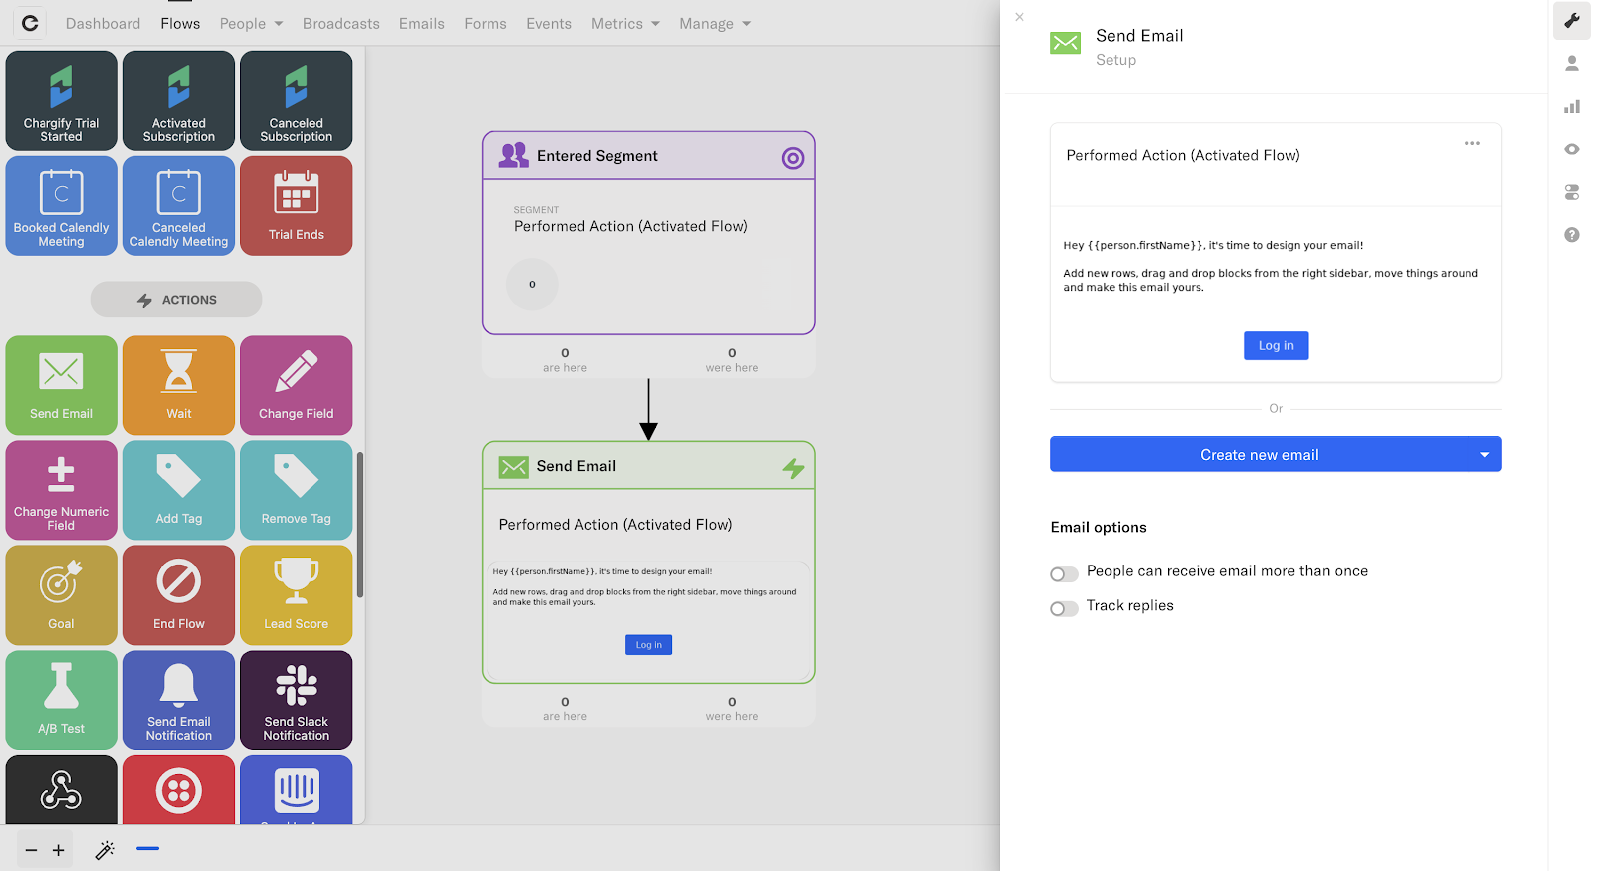
- Now that our trigger is set, we need to add the action step "Send Email". On the left of the screen, scroll down until you see the "Actions" section. Click and drag the "Send Email" action onto the canvas.
- Open the newly added "Send Email" action and click "Select Email". Navigate to the correct email and click on it.
- Lastly, hover over the "Entered Segment" trigger and click on the arrow, then drag it over the "Send Email" action. This will connect the trigger with the action and your flow is ready to be deployed.
- At the bottom right of the screen, click the on/off button to activate your flow.
5. Wrap up
As a recap, here’s what we’ve done in this recipe:
- We started sending customer behavior data from Segment.com to Encharge
- We mapped out the flow of our email campaigns, including different branches, for different personas and events.
- We built the campaign in Customer.io and started sending emails.
Getting your first behavior-based campaign set up involves quite a few steps. However, once your flow is created in Encharge.io, you can reuse the same principle and create and expand your behavior-based campaign arsenal. Segment.com and Encharge open endless possibilities for advanced behavior-based email marketing campaigns that convert, guide, and delight customers.
Updated on: 25/03/2025
Thank you!